A reliable client onboarding workflow is the difference between
closing a deal with momentum and losing the next hour to admin work.
You just got off a discovery call. The client said yes. They are
ready to start. Instead of celebrating, you open Stripe to create
an invoice, open Google Drive to make a folder, and draft the same
welcome email you’ve written 50 times before.
For a solo operator, onboarding can involve repeated billing, document and email steps. This guide shows how to connect n8n, Stripe and Google Drive, while keeping approval and failure checks in the process before a client receives a welcome message.
The 45-Minute Tax Every Freelancer Pays After Closing a Deal
You just got off a discovery call. The client said yes. They are ready to start.
Instead of celebrating, you immediately become an administrative robot. You open your billing software to create an invoice. You open Google Drive to create a shared project folder. You draft a welcome email detailing the next steps. You copy-paste the same links you send to every new client.
For a solo operator, this 45-minute administrative cost destroys your momentum — and it happens every single time you close a deal.
Quick answer: Start an onboarding workflow when a CRM deal is marked Closed Won. Validate the client’s details, prevent retries from duplicating work, confirm any required contract or approval, then create a payment step and a restricted project folder. Send the welcome email only after the prerequisites succeed; exceptions should notify a human.
Build the sequence in test mode first, using a fictional event and an explicit branch for missing information.
Dry-run a client onboarding event
Use the fictional client onboarding JSON cases in an n8n test workflow. A closed_won event for Cedar Studio should pass required-field checks, then enter a contract or approval branch; a retry with the same event ID should be skipped; an event without a client email should stop for review. These are expected routing outcomes, not a live Stripe or Google Drive test.
Before connecting production accounts, replace the placeholder Stripe test Price ID, use test mode, and verify access on a test Drive folder. Keep a durable record of the event ID or client-and-service key so a retry does not send a second welcome email or create a duplicate workspace. Send the welcome message only after the required contract, payment and folder steps have succeeded.
🔄 Updated September 2026
Disclosure: Operant Solo is reader-supported. We may earn an affiliate commission when you purchase through links on this page, at no additional cost to you. Recommendations are based on independent testing and evaluation.
What a Great Client Onboarding Process Actually Looks Like
Before building anything, it helps to understand what you’re aiming for. A great customer onboarding process doesn’t just confirm the payment — it sets the tone for the entire working relationship.
From the client’s perspective, a premium onboarding experience looks like this:
- They say yes on the call
- Within minutes, they receive a professional email with their contract, payment link, and project workspace — all personalised with their name and project details
- They sign the contract, pay the invoice, and have access to a shared workspace — all in one seamless flow
- They know exactly who their point of contact is, what happens next, and when work starts
- They feel like they hired an agency, not a solo freelancer
Automation can shorten the administrative work after a client agrees to proceed, but the timing depends on contract approval, payment setup, permissions and failed steps. Measure your own manual baseline and test a complete run before promising a turnaround time.
The Problem with Manual Onboarding (And All-in-One Platforms)
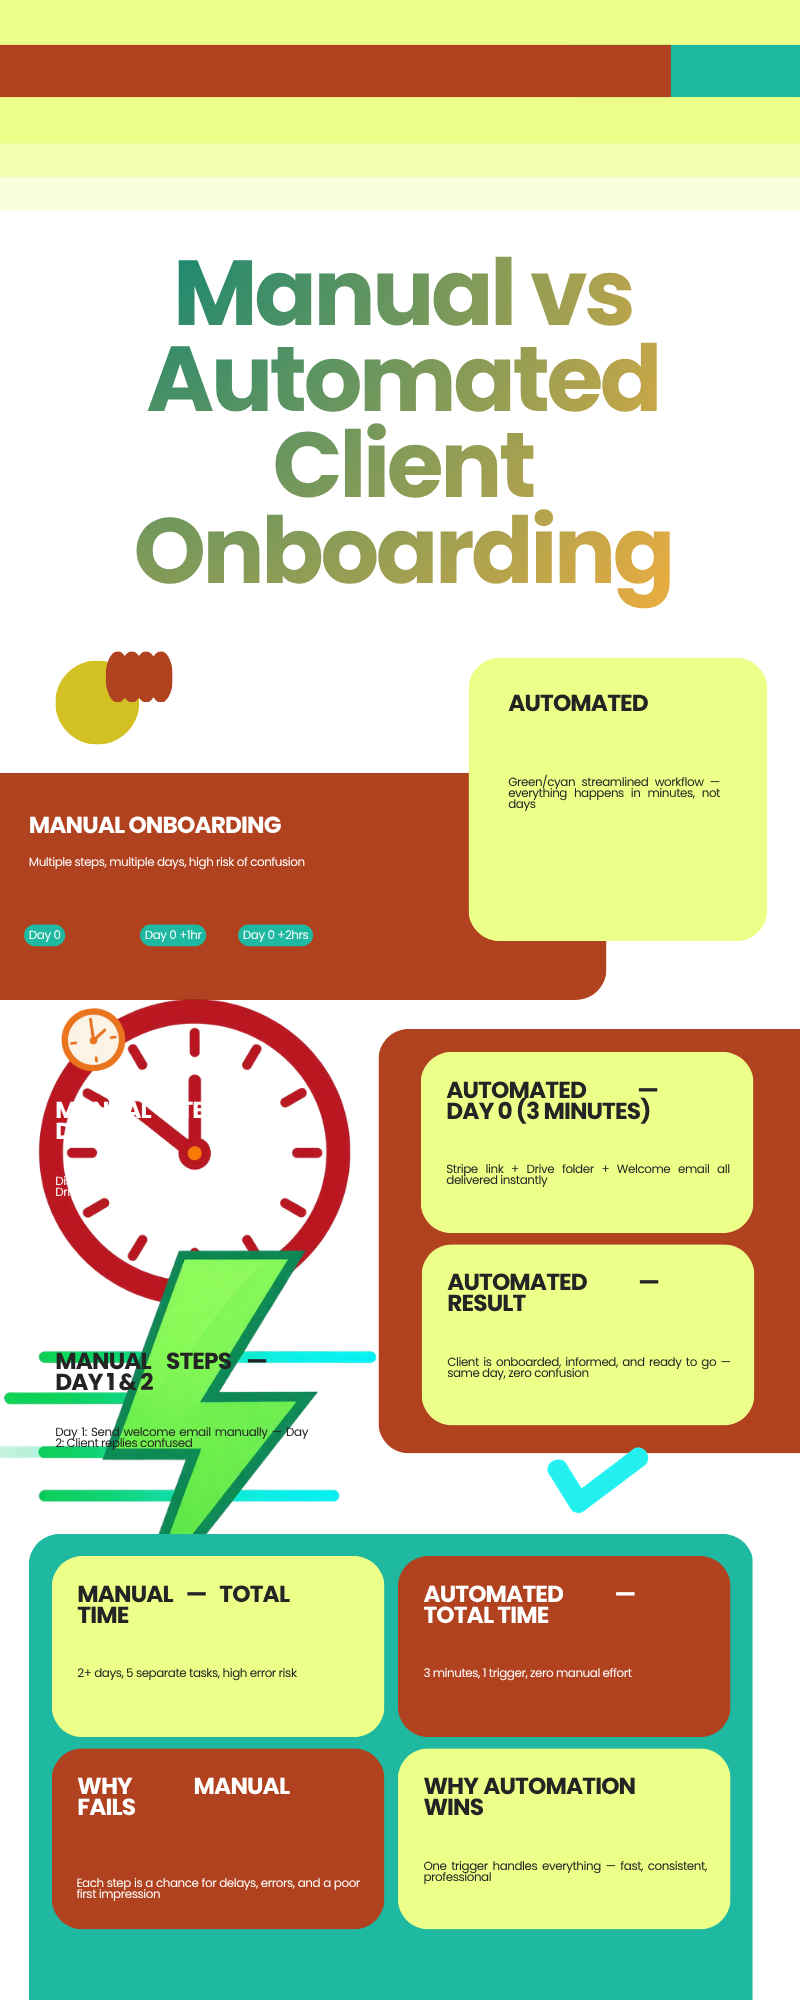
Manual onboarding is error-prone. When you’re rushing between calls, you might forget to update the permission settings on the Google Drive folder, or paste the wrong invoice link into the welcome email.
Many freelancers solve this by subscribing to “all-in-one” platforms like HoneyBook or Dubsado (£30–£40/month). These tools are excellent — but they lock you into their built-in tools. You use their contract builder, their payment system, their scheduler. There’s no room to plug in Airtable, or use a specific AI model, or build a custom approval flow.
If you prefer a modular stack — Stripe for payments, Google Workspace for files, Airtable or Notion for your CRM — you can build a custom onboarding automation that costs a fraction of the price and does exactly what your business needs.
Data Collection: What to Gather Before the Onboarding Starts
The weakest point in most freelance client onboarding processes is data collection. Most freelancers only collect a name and email — then spend the first week back-and-forth asking for project details, brand assets, and login credentials.
Build a structured data collection intake form (using Tally.so, Typeform, or Google Forms) that fires before the contract is sent. Collect:
| Data Point | Why You Need It | Where It Goes |
|---|---|---|
| Full name + company | Personalises all documents and emails | CRM record, contract template |
| Project type + scope | Pre-fills the services agreement template | Contract node in n8n |
| Budget and timeline | Auto-selects the correct Stripe Price ID | Stripe payment link node |
| Primary email | Routes all automated comms | Gmail/SMTP node |
| Point of contact name | Personalises the welcome email | Email template variables |
| Brand assets (logo, colours) | Uploaded to their Drive folder | Google Drive node |
| Key logins needed | Shared via LastPass/1Password, not email | Secure credential node |
When this form is completed, the webhook trigger fires and the entire onboarding workflow begins — no manual action needed from you.
The “Zero-Admin” Architecture
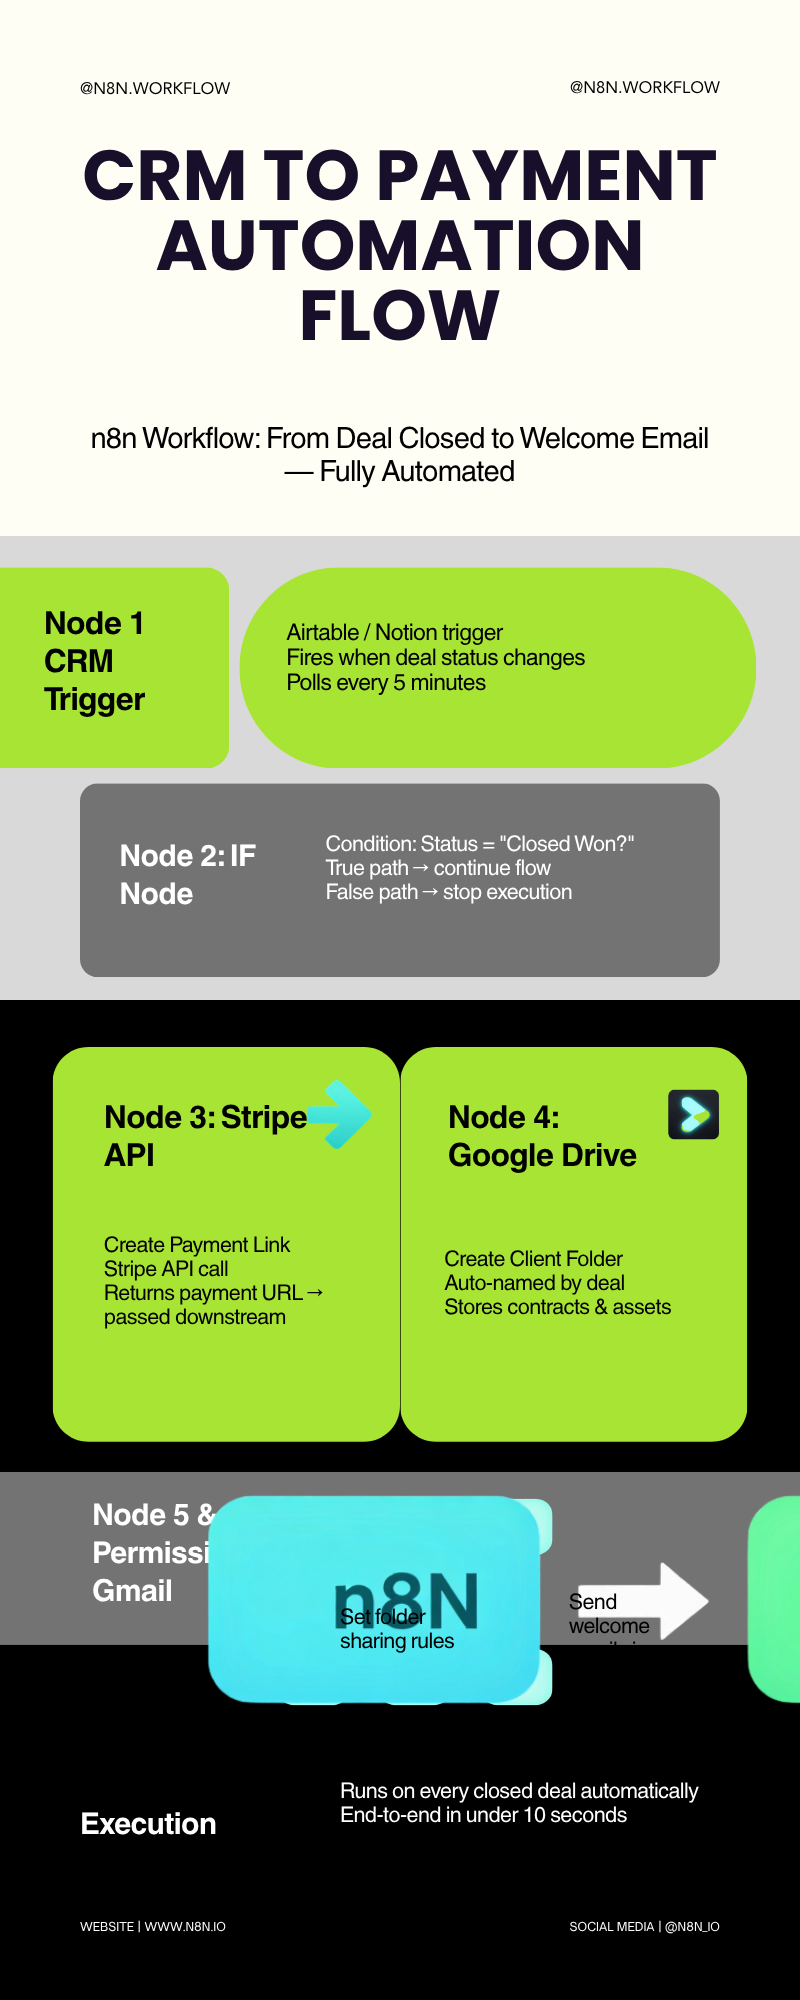
This workflow uses n8n as its central automation engine. Here’s the step by step architecture:
BEFORE: You manually create invoices, folders, and emails after every close.
AFTER — The Automated Workflow:
- You mark a client as “Closed Won” in your CRM (one click).
- n8n’s webhook trigger catches the status change in real time.
- n8n calls the Stripe API to generate a unique payment link.
- n8n creates a named Google Drive folder for the project.
- n8n sends the client a personalised welcome email with both links.
The only manual action: clicking “Closed Won” in your CRM. Everything else is handled automatically.
Step-by-Step: Building the Onboarding Workflow
Step 1: The Webhook Trigger (CRM Status Change)
First, tell n8n when to start. This is the webhook trigger that kicks everything off.
- Open n8n and add a trigger node for your CRM — Airtable, Notion, HubSpot, or any other platform you use.
- Set the event to Updated Record (Airtable) or Page Updated (Notion).
- Add an If Node immediately after the trigger. Set the condition to check:
Status field equals "Closed Won".
Why the If Node matters: Without it, the client onboarding workflow fires every time you update any field on any client record — changing a phone number, updating a note, anything. The If Node ensures the onboarding workflow only runs when a deal is actually closed.
Supported CRM triggers in n8n:
| CRM | Trigger Method | Setup Difficulty |
|---|---|---|
| Airtable | Native Airtable trigger node | Easy |
| Notion | Webhook via Notion API | Medium |
| HubSpot | Native HubSpot trigger node | Easy |
| Google Sheets | Apps Script webhook | Medium |
| Pipedrive | Native Pipedrive trigger node | Easy |
| Any other CRM | HTTP Request + webhook URL | Medium |
Step 2: The n8n Stripe Integration — Generating the Payment Link
This is the heart of the n8n Stripe integration. Instead of logging into Stripe manually, the API creates the invoice in real time.
- Add a Stripe Node and connect your Stripe API credentials (stored securely in n8n’s credential manager — never hardcoded).
- Set the resource to Payment Link and the action to Create.
- Map the Price ID (set up in your Stripe dashboard for each service type) and the quantity.
What to check: Stripe’s Payment Links API returns a shareable URL for the configured price; a Payment Link can be reused, so do not assume each client automatically receives a unique URL. If the process requires a client-specific checkout session, create and track a Checkout Session instead. Use a Stripe test Price ID and check the returned object and metadata before emailing anything.
Pro tip: Create separate Stripe Price IDs for each service package you sell (Basic, Standard, Premium). Then use an n8n Switch node to route to the correct Price ID based on the project type field from your intake form. The payment link the client receives is always for the exact right service.
Step 3: Creating Custom Client Workspaces in Google Drive
Next, prepare the project environment. This is where creating custom client workspaces at scale becomes possible.
- Add a Google Drive Node. Connect your Google Workspace account.
- Set the resource to Folder and the action to Create.
- In the “Name” field, dynamically map:
{{ $json.ClientName }} - Project Assets - Add a second Google Drive Node → set resource to Permission → action to Create. Map the newly created Folder ID and grant “Writer” access to the client’s email address.
Common mistake: Skipping the permissions node. If you do, the client receives the Drive link but then has to click “Request Access” — which sends you a notification and delays their start. Always add the permissions node.
Optional — pre-populate the folder with template files: Add a third Google Drive node that copies your standard template documents (project brief template, deliverables tracker, brand assets folder) into the new client folder. Every client starts work with a professional workspace already set up.
Step 4: The Welcome Email
Finally, deliver everything to the client in one clean email.
- Add a Gmail or SMTP Node.
- Set the recipient to
{{ $json.clientEmail }}. - Draft your welcome email using dynamic variables to insert the Stripe payment link and the Drive folder URL.
Tone guidance for the email: Keep it warm and direct. Avoid overly formal language (“Please find attached herewith the relevant documentation”) and avoid overly casual language (“Hey! So excited to work together!!!”). Aim for professional-but-human:
Hi [Client First Name],
It’s great to have you on board. Here’s everything you need:
- 📄 Review and sign your services agreement: [DocuSign/PandaDoc link]
- 💳 Complete your payment: [Stripe Payment Link]
- 📁 Access your project workspace: [Google Drive Folder Link]
Once you’ve completed these three steps, I’ll be in touch within 24 hours with your project schedule.
Looking forward to working together,
[Your Name]
[Point of Contact / Your Title]
[Your Business Name]
Handling Contracts: Adding a Services Agreement Step
If your business requires a signed the contract step before payment — which is strongly recommended for any project over £500 — you can insert an e-signature node between Step 1 and Step 2.
How it works:
- After the CRM trigger fires, n8n sends a services agreement via PandaDoc or DocuSign using their API.
- Add a Wait Node (Human-in-the-Loop) that pauses the entire workflow until the contract is signed.
- Once PandaDoc/DocuSign fires the “document signed” webhook, n8n wakes up and continues to the Stripe payment link step.
This ensures no invoice is ever sent before the client has signed the contract — protecting both parties.
Contract tool options:
| Tool | Monthly Cost | n8n Integration | Best For |
|---|---|---|---|
| PandaDoc | £19/mo (Essentials) | Native API node | Professional agencies |
| DocuSign | £10/mo (Personal) | HTTP Request node | US-focused clients |
| Zoho Sign | £7/mo | HTTP Request node | Cost-conscious freelancers |
| Dropbox Sign | £15/mo | HTTP Request node | Design/creative freelancers |
| Free option | £0 | PDF email attachment | Low-volume freelancers |
Creating Custom Onboarding Experiences for Different Client Types
One size doesn’t fit all clients. The creating custom onboarding experiences capability of n8n is where it truly outperforms all-in-one platforms.
Use an n8n Switch Node after the CRM trigger to route clients into different onboarding tracks based on their project type:
- Track A — Design clients: Folder template includes brand asset sub-folders, a style guide template, and a revision request form.
- Track B — Development clients: Folder includes a technical brief template, GitHub repo link, and staging environment access document.
- Track C — Consulting clients: Folder includes a discovery questionnaire, a session schedule template, and a shared Notion notes page.
Each track sends a different welcome email, creates a different Drive folder structure, and uses a different Stripe Price ID. The client never knows the difference — they just experience onboarding experiences that feel designed specifically for them.
After Onboarding: Automating the First Week
The onboarding workflow doesn’t have to stop at the welcome email. Here’s what you can automate in the first week after a client starts work:
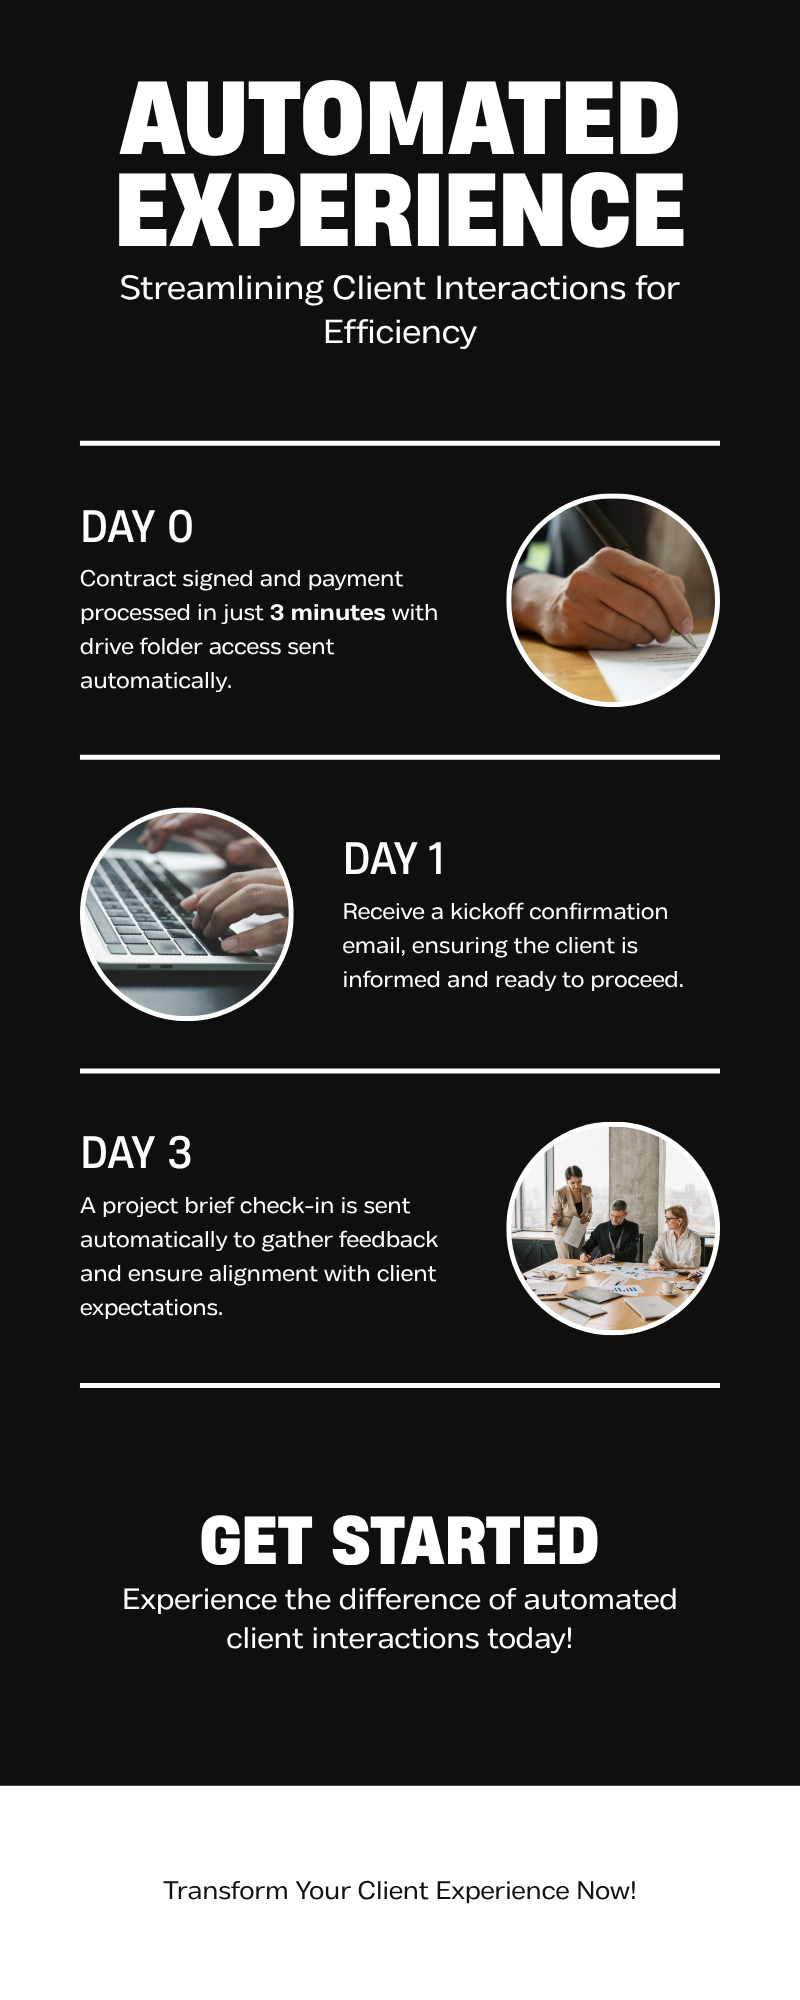
- Day 1: Automated “day one” email confirming the project kickoff meeting time.
- Day 3: Automated check-in asking if they’ve had a chance to review the project brief.
- Day 7: Automated first-week summary email with a link to book a progress call.
Each of these is a simple n8n node triggered by a time delay after the initial onboarding date. No manual follow-up needed from you or any team members.
This level of attention creates onboarding experiences that clients tell other clients about. You aren’t doing extra work — the automated workflows are doing it for you.
Cost Breakdown: Manual Admin vs. Custom n8n Stack
Let’s look at the real financial picture.
| Solution | Monthly Cost | What It Includes | Flexibility |
|---|---|---|---|
| HoneyBook / Dubsado | £30–£40/mo | All-in-one: contracts, payments, scheduler | Low — locked to their tools |
| n8n Cloud + Stripe + Drive | £20/mo + % per tx | Modular, connects to any tool | High — fully customisable |
| n8n Self-hosted + Stripe + Drive | ~£5/mo (server) | Same as above | Highest — your infrastructure |
| Manual (no automation) | £0 tool cost | Your time (45 min × clients) | N/A — not scalable |
Illustrative time calculation: If onboarding takes 45 minutes per client and you onboard 10 clients in a month, that is 7.5 hours of admin work. At an assumed £50 hourly value, the time is worth £375; those are example inputs, not measured savings. Subtract the setup, maintenance, review and software costs from any estimated benefit.
For freelancers operating in markets like India, saving ₹3,000–5,000/month on SaaS tools while recovering billable hours directly improves take-home margin. For operators in the US or UK, the primary ROI is immediate reclamation of billable time.
Limitations and Security
Security: You’re passing financial intent (Stripe) and file access (Google Drive) through an automation platform. If you’re self-hosting n8n, your server must have HTTPS enabled. Never hardcode API keys into plain text — always use n8n’s built-in credential manager.
Error Handling: If Stripe experiences an API outage when you click “Closed Won,” the client onboarding workflow fails silently and the client receives nothing. Always:
- Check your n8n execution logs daily
- Add an “Error Trigger” node that sends you a Slack or email alert when any workflow crashes
- Test every workflow with a real test transaction before going live
Webhook reliability: The webhook trigger that listens for CRM changes requires your n8n instance to be accessible via a public HTTPS URL. For self-hosted setups, use a reverse proxy (Nginx + Let’s Encrypt) or a tunnelling tool like Cloudflare Tunnel.
If one of your tools has no API, see our no-API integration guide for alternatives.
Next Steps
By automating your client onboarding process, every client gets a professional, immediate, error-free experience the moment they agree to work with you — whether you’re awake or asleep.
Your acquisition pipeline is now fully automated. Start with the simplest possible version: CRM trigger → Stripe payment link → Gmail welcome email. Once that works, layer in the Drive folder, the contract step, and the first-week follow-up sequence.
Build it once. Let it run. Focus on the actual work.
Frequently Asked Questions
What is a freelance onboarding workflow?
A freelance onboarding workflow is a sequence of automated steps that runs the moment a new client is confirmed — generating a payment link, creating a project workspace, and sending a welcome email. Using a tool like n8n with a webhook trigger, the entire client onboarding process can complete in under 5 minutes without any manual action from you.
How does the n8n Stripe integration work for onboarding?
The n8n Stripe integration uses Stripe’s API to create a unique payment link for each client automatically. When your CRM triggers the onboarding workflow, n8n calls the Stripe API with the correct Price ID and generates a fresh checkout URL. This URL is then inserted into the welcome email — no logging into Stripe, no manual invoice creation.
What data should I collect before onboarding starts?
Before onboarding, collect: full name, company, project type, budget range, primary email, point of contact details, and any brand assets or logins needed. This data collection step, done via an intake form connected to your onboarding automation, ensures the client onboarding workflow has everything it needs to personalise all documents and emails automatically.
Do I need a signed contract before the payment link is sent?
Best practice is yes — especially for projects over £500/$500. You can add a PandaDoc or DocuSign node to your onboarding workflow that sends the services agreement first, then uses n8n’s Wait Node to pause until the client has signed the contract before generating the Stripe payment link.
How does this compare to HoneyBook or Dubsado?
Managed onboarding tools and a custom n8n stack have different subscription and maintenance costs. Compare current plan prices with your volume, required contract and payment features, setup time, and ongoing support before deciding.
Can I create different onboarding sequences for different client types?
Yes. n8n’s Switch Node lets you build separate onboarding workflow tracks for different project types — each with a different Drive folder structure, email template, and Stripe Price ID. This creating custom onboarding approach means every client receives onboarding experiences tailored to their specific project, not a one-size-fits-all template.
What happens if a step in the workflow fails?
Check your n8n execution logs — every failed run is recorded with the exact error and the data at the point of failure. For proactive monitoring, add an “Error Trigger” node that sends you a Slack or email alert the moment any part of the onboarding automation fails, so you catch and fix it before the client notices.
Related Reading:
- How to Build an AI Email Parser (And Stop Manual CRM Entry) →
- How to Automate Your Freelance Business (And Stop Doing Free Admin Work) →
- AI Lead Enrichment: How to Automate Client Research →
- n8n Human in the Loop: How to Safely Control AI Agents →
- n8n Review 2026: Is Self-Hosting Actually Worth the Effort? →
n8n
Best for: technical automation workflows
Consider n8n when your workflow needs custom logic or control over deployment. Self-hosting also requires time for updates, backups, and monitoring.
Operant Solo may earn a commission if you purchase through this link, at no extra cost to you.
Pingback: AI Agent Workflows for Solopreneurs: What's Safe to Automate in 2026
Pingback: How to Build an AI Email Parser (And Stop Manual CRM Entry)
Pingback: How to Automate Freelance Business (And Stop Doing Free Admin Work)
Pingback: AI Lead Enrichment: How to Automate Client Research
Pingback: How to Build Multi-Model AI Agents in n8n Using GitHub's HydraFusion Patterns (Cut Costs Up to 67%) - Operant Solo